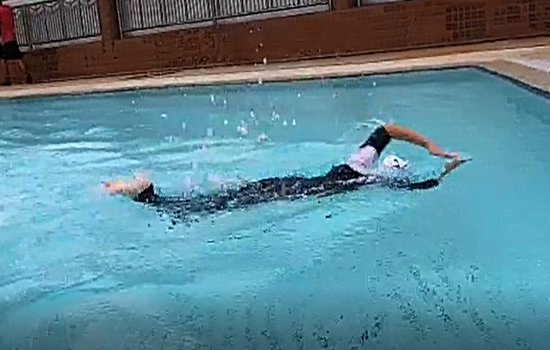
How To Swim Freestyle?

How To Swim Freestyle?
Freestyle
Step 1: Body Position
The head remains in a neutral position, face down, except when breathing. Keep your head in line with the rest of your body. Keep your body flat, lie facing down in the water with your body kept in line with the water surface.
Step 2: Leg Action
With ankles relaxed and flexible, point your toes behind you and kick up-and-down in a continuous motion from your thighs. Kicking from the calves is not as effective and a simple way to correct this is to make sure your legs are straightened out whilst kicking. Kick from the hips and thighs. Flutter kick just below the surface of the water. Although kicking accounts for only 15-30% of the power in your stroke, it is still an important part of your freestyle technique. Keep your hips close to the surface of the water and make a series of small quick kicks. You want to focus on minimizing drag while you propel yourself forward; therefore, your kicking range of motion should be narrow.
Step 3: Arm Movement
In the freestyle stroke, the arms execute alternating movements. While one arm moves and pulls underwater from an extended forward position to the hip, the other arm recovers above water from the hip to the extended forward position. Once this is done, the arms switch roles, such that each arm pulls and recovers once over the entire stroke cycle.
Your arm movement can be broken down to the simplest form consists just two actions – the Pull and Recovery.
- Pull – With your palms facing down, pull in-line with your body with a slightly bent elbow all the way to the side of your upper thigh.
- Recovery – With your hand close to your upper thigh, lift one arm out of the water with a bent elbow. Reach forward over the water with a bent elbow and enter the water with your finger tips.
Rotate your body in line with your arm stroke. Rotating your body correctly will help you with many important aspects of your stroke. First, you can put more power into your arm stroke. Second, you will minimize drag. And third, it will enable you to breathe correctly. As you rotate your body left and right with your alternating arm strokes. Focus on rotating your body from the hips and not from the shoulders.
Step 4: Breathing Technique
Choosing a side to breathe will depend on being right or left handed. Whilst your hand is early in the recovery phase, turn your head sideways for a quick breath (one second). Rotate your body to the surface, and inhale through your mouth. This will allow you to keep your neck muscles and your head relaxed.A very common mistake is to lift your head upwards instead of turning it sideways to avoid the water for breath. This is actually counter-productive as it disrupts your body positioning and causes you to dip further into the water. Do not lift your head up- this will cause your hips and legs to fall, and you will have to work to regain your balance. Continue to keep your body and arms outstretched while you breathe. Keep your body straight, and do not lose your extension while you breathe.
Helpful Tips
- Stretch your arms as far as they can go to make a longer stroke. A large arm stroke is essential to speed and efficient swimming
- Keep a straight body to maintain body streamline to reduce drag and make swimming easier
- Do not hold your breath longer than you need to when you swim. Breathe at every stroke if you feel the need.
- While underwater, make sure to exhale out all of the air so that you are not having to exhale any last bit of air when you should be inhaling.
- Rotate your body forward as well. Your arm and shoulders should extend forward and your body should rotate forward after your hand and arm have entered the water.
More Information
- Swimming Lessons Singapore
- Kids Swimming Lessons
- Adult Swimming Lessons
- Ladies Swimming Lessons
- Private Swimming Lessons
- Condo Swimming Lessons
- Bukit Batok Swimming Lessons – Flagship Class
- Jurong West Swimming Lessons – Flagship Class
- Westwood Residence – Flagship Class
- Registration
- Common FAQs
- SwimSafer Award
- Testimonials
- Rates
- Swimming Complex In Singapore
- Breaststroke
- Backstroke
- Butterfly
Promotion
